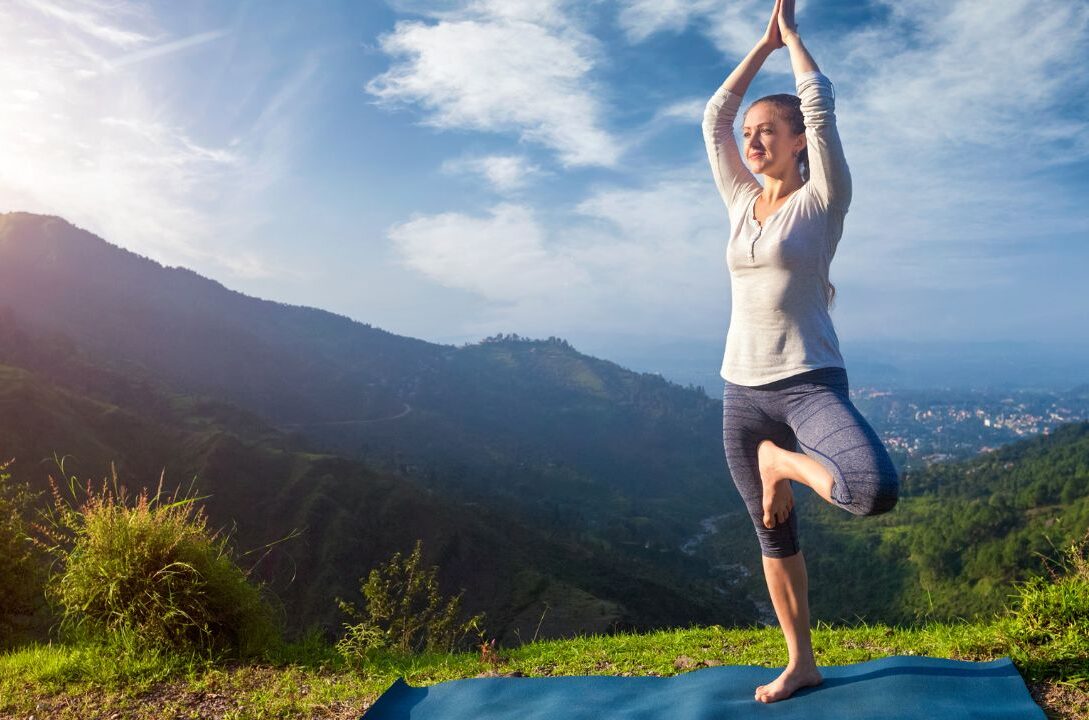
Yoga is an ancient practice that can be used for both physical and mental health benefits. It can help to reduce stress, improve flexibility, and even aid in weight loss.
If you’re a beginner looking to start yoga as part of your weight-loss journey, there are certain poses you can do to help you achieve your goals.
In this blog post, we’ll be discussing the best yoga for beginners that can help you to lose weight. We’ll also provide tips on how to stay motivated and consistent with your practice.
It is scientifically proven that yoga asanas help in weight loss. In various studies, it is clear that the majority of persons sees a noticeable change in weight and also felt better mentally.
When yoga asanas combined with clean eating, the right blends of exercises, breathing techniques and meditation, it works wonder for overall weight management—due to unhealthy lifestyle and junk food, maybe led to an increase in obesity.
Best Yoga Poses for reducing Weight
Following are the Best yoga asanas for reducing weight at home and helps in losing love handles.
1. Cobra pose
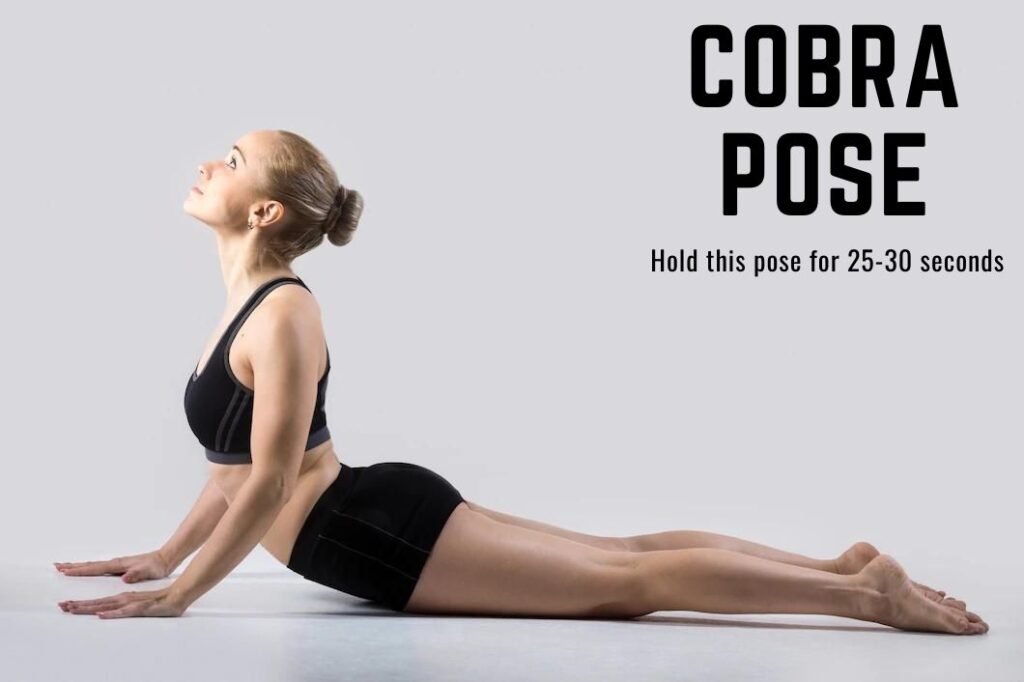
The name Bhujangasana is a Sanskrit word ‘bhujanga’ which translates to ‘snake’, and ‘asana’ means ‘posture’. It helps in strengthening abdominal muscles and relaxing your lower back. Always make sure you had your meal 4-5 hours before performing this asana. So, morning is the best time for doing this yoga.
How to perform Cobra Pose:
- Lie on your tummy on the floor.
- Place your hands next to your shoulders.
- Feet should touch each other, and slowly inhale and lift your upper body.
- Hold this pose for 25-30 seconds.
- Release and come back to the starting points.
Benefits of Cobra Pose:
- It helps in increasing the flexibility of the spine.
- It also helps in opening the lungs, which is beneficial for asthma.
- This pose also improves digestion.
- It helps to tone the buttocks.
- Also helps in relieving stress and fatigue.
2. Warrior I
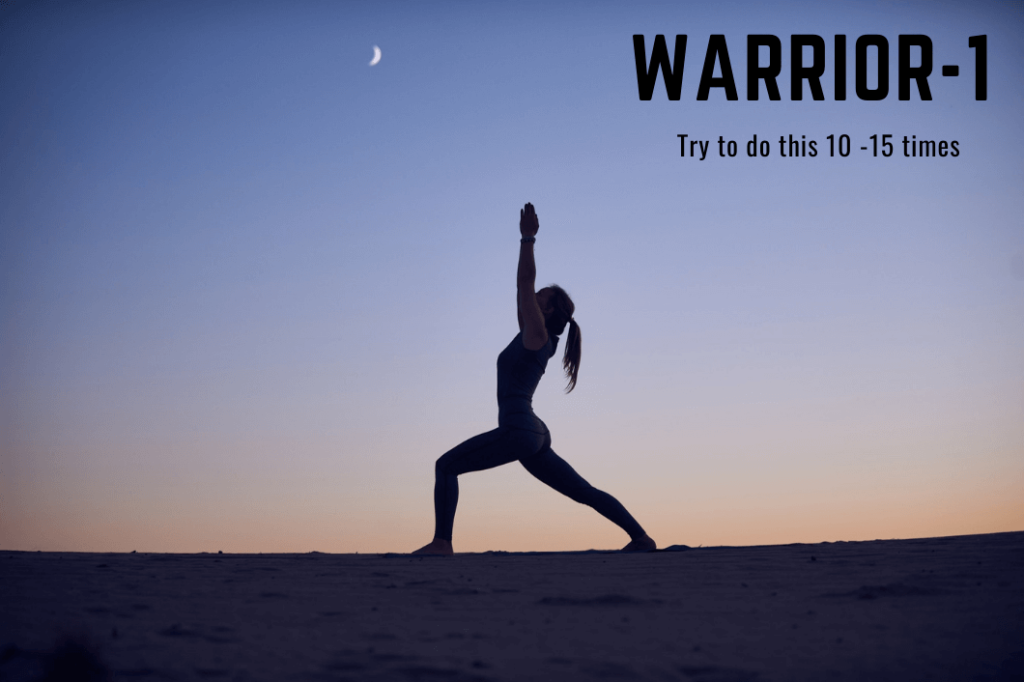
Warrior I is also known as “Virabhadrasana 1” is one of the more common yoga poses but also be one of the most challenging.
How to perform Warrior I:
- To begin, stand with your feet together, then step one foot back, making sure it is in line with the heel of the other foot.
- Both feet should be parallel, shoulder width apart. As you bring your arms up, make sure that your shoulders are directly over your hips.
- Your palms should face each other as you reach upward and pull your shoulder blades down.
- Engage your core and press into your feet as you draw your lower belly in and up. Lift your heart forward by gently pressing your shoulder blades together and drawing the tops of your shoulder blades toward the spine.
- Hold Warrior I for several breaths and be sure to focus on maintaining proper alignment in your neck and shoulders.
- To come out of this pose, gently release your hands and bring them down to the sides of your body as you step both feet together.
- Try to do this 10 -15 times.
Benefits of Warrior I
- Strengthens your back, legs, shoulders, arms, and ankles.
- Opens up your lungs, chest, and hips.
- Enhances stability, balance, and focus.
- Promotes healthy breathing and blood flow.
- Stretches your shoulders, neck, tummy, groynes, arms, legs, and ankles.
- Gives the body its lost energy.
3. Triangle Pose
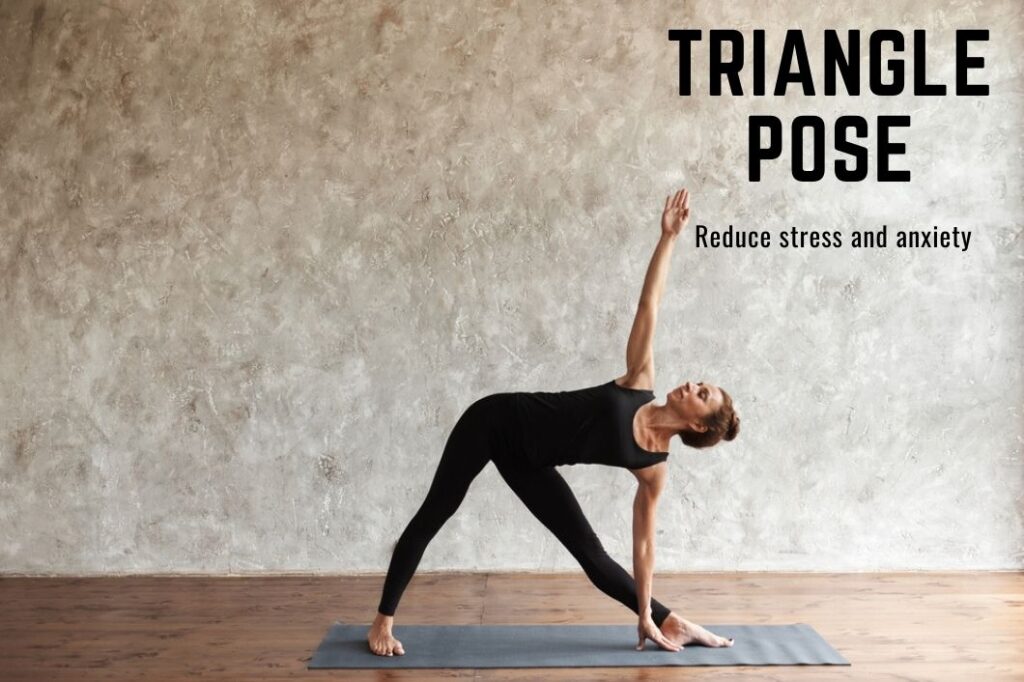
Triangle Pose can help to stretch and strengthen the legs, hips, and spine, as well as improve balance and posture. Additionally, it can help to open up the lungs, improving respiration. As an added bonus, this pose can also help to reduce stress and anxiety while promoting feelings of calmness.
How to perform Triangle Pose
- To get into this pose, begin by standing with your feet hip-width apart and arms stretched out to your sides.
- Step your right foot out wide to the right, about three feet apart.
- Bring your hands together in prayer pose at your heart center and turn your left toes slightly inwards so your heel is facing the corner of the room.
- Lift your arms up until they are parallel with the ground, then slowly hinge forward from the hips.
- Let your left hand reach down and rest on the floor (or a block if you need it). Reach your right arm up towards the ceiling, making sure that both sides of your torso are even and balanced.
- Keep your neck long, chest open, and gaze up towards your right fingertips. Stay here for five breaths and then switch sides.
Benefits of Triangle Pose
- Strengthen the legs, hips, and spine, as well as
- Improve balance and posture.
- Open up the lungs, improving respiration.
- Reduce stress and anxiety while promoting feelings of calmness.
4. Side Plank
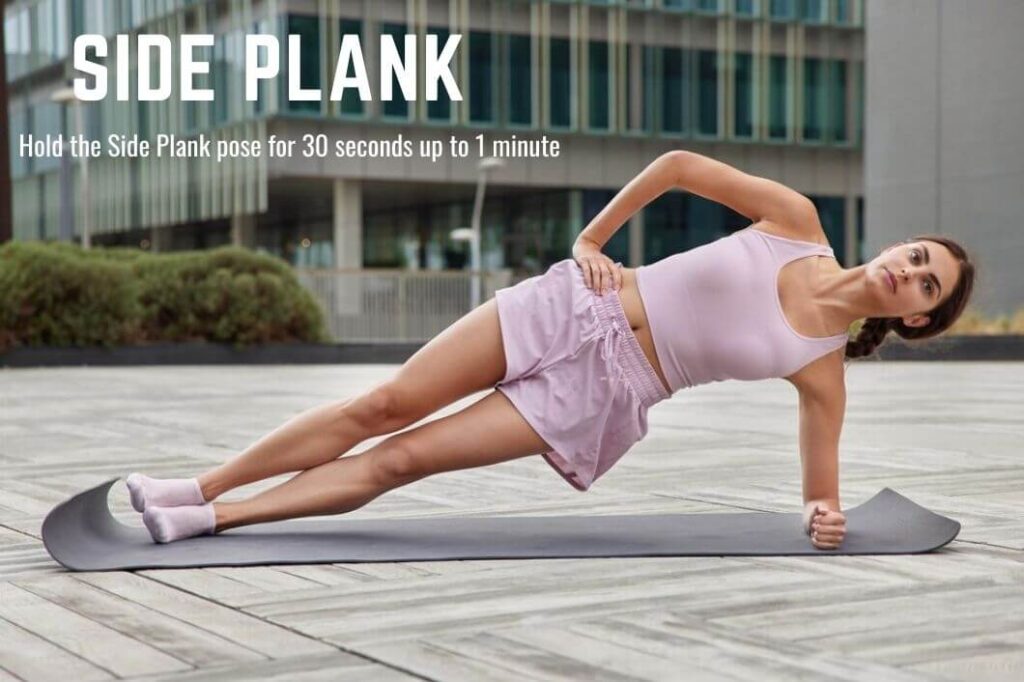
The Side Plank is a great pose for beginners looking to improve their strength and flexibility while trying to lose weight. This pose helps to strengthen the core and arms, while stretching the entire side of the body.
How to perform Side Plank
- To begin, start in a plank position on your hands and feet.
- Then turn your body to one side, balancing on one arm and the side of one foot.
- Your feet should be stacked on top of each other, with the top foot slightly forward. Make sure your hips are lifted and that your body is in a straight line.
- Try to keep your neck in a neutral position and gaze forward.
- Hold the Side Plank pose for 30 seconds up to 1 minute.
You can also add variations to the pose such as raising and lowering your hips, or lifting one leg higher than the other for a more intense workout.
Benefits of Side Plank
- Improve strength and flexibility.
- Strengthen the core and arms
- Reduces your risk of a back injury
- Improve your balance and posture
5. Boat Pose
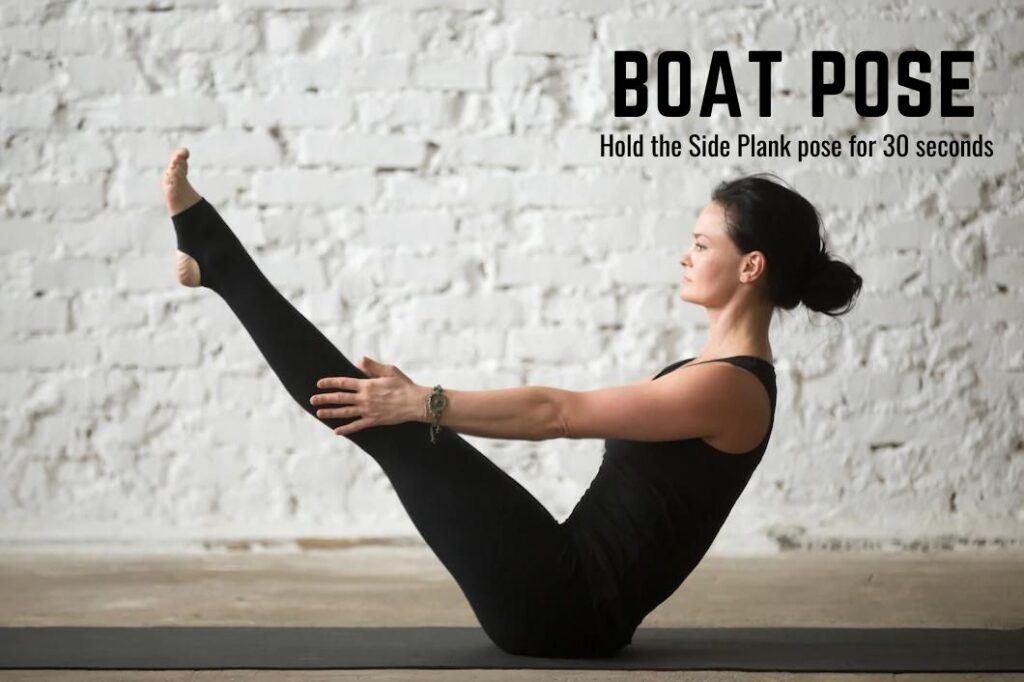
Boat pose does work on your abdominal muscles. It helps you stand taller and make you better in physical activity, helps prevent injury, and improve activities like running or rock climbing.
How to perform Boat Pose
- To begin Boat Pose, start by sitting on the ground with your legs extended out in front of you. Make sure that your spine is straight and your feet are flat on the ground.
- Keep your arms alongside your body with your palms facing down.
- Inhale and as you exhale, lift your feet off the floor and straighten your legs until they form a 45 degree angle with the floor.
- Your torso should now be lifted off the ground and your arms should be parallel to the ground.
- Your body should be in the shape of a “V”. Keep your core engaged and make sure that your shoulders are away from your ears.
- Hold this position for 15-20 seconds and keep breathing normally.
- To come out of the pose, lower your feet to the floor while exhaling.
- Take a few deep breaths before moving on to the next pose.
Benefit of Boat Pose
- Strengthens abdominal muscles.
- Improves balance and digestion.
- Strengthens your spine and hip flexors.
- Helps in stress relief and retain calmness.
6. Chair Pose
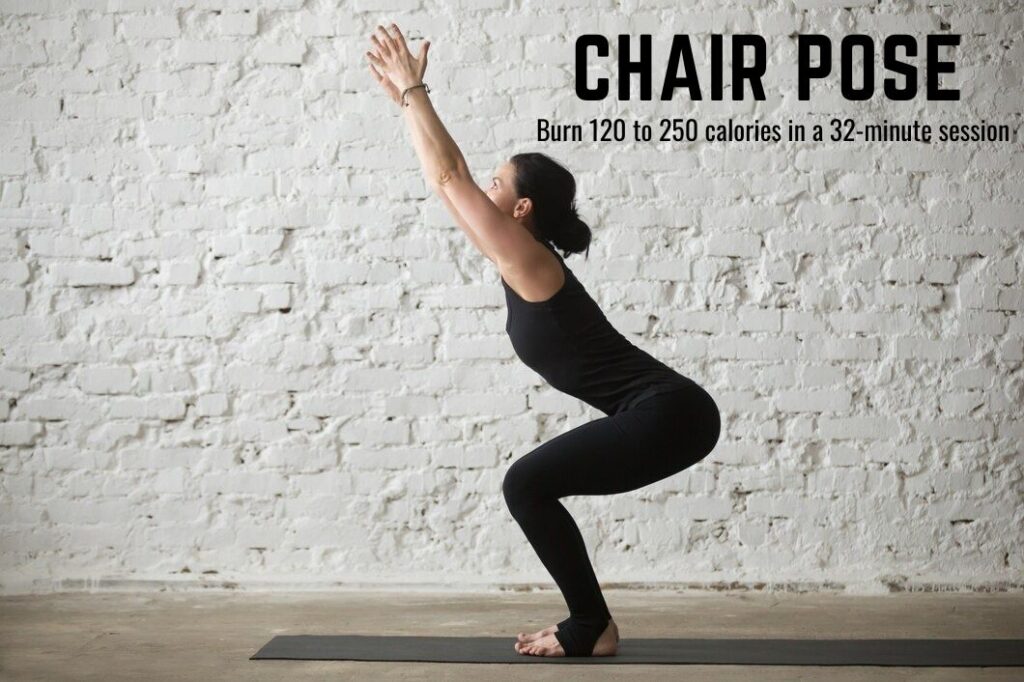
Chair pose also known in Sanskrit as ‘Utkatasana.’ While stretching the upper back, the chair position significantly strengthens the lower body. The entire body is energised and revitalised by this stance.
How to perform Chair Pose
- To get into Chair Pose, begin standing with your feet hip-width apart and your arms extended out in front of you at shoulder height.
- Inhale as you bend your knees and lower your hips back and down, sending your sit bones toward the floor and your chest up towards the ceiling.
- Keep your spine long and straight, making sure to draw your navel towards your spine to activate your core muscles.
- Hold the pose for three to five breaths before releasing.
Benefit of Chair Pose
- Strengthen your ankles, thighs, calves, and spine
- Reduces flat feet
- It burn 120 to 250 calories in a 32-minute session
7. Downward Dog pose
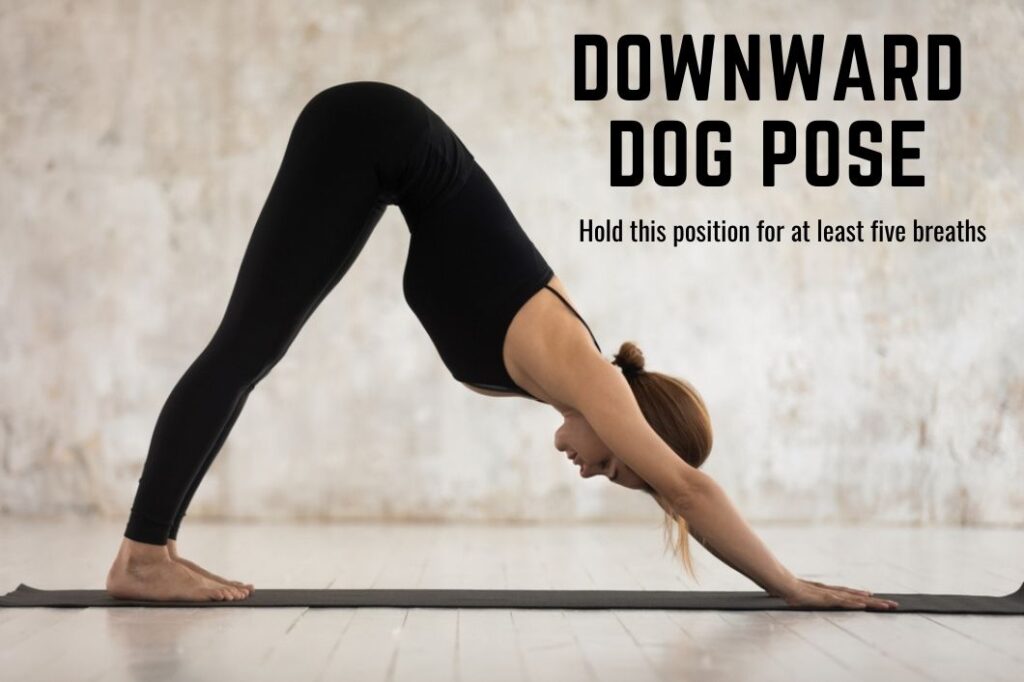
This pose helps to increase flexibility, strengthen your muscles, and improve your posture. Additionally, Downward Dog pose can help relieve tension in your back and shoulders and can help to reduce stress.
How to perform Downward Dog pose
- To do Downward Dog pose, start by coming onto your hands and knees. Align your wrists directly below your shoulders and spread your fingers wide apart.
- Curl your toes under and press back into your heels, lengthening your spine towards the ceiling and pressing your pelvis up towards the sky.
- Push down into the floor with your palms, engaging your arms and pushing back through your legs. You should feel a strong stretch in your hamstrings and calves, as well as in the rest of your body.
- Hold this position for at least five breaths, focusing on keeping your breathing even and relaxed.
If you’re comfortable with the pose, you can even walk your feet closer to your hands, or lift one leg up into the air while maintaining your balance.
Benefit of Downward Dog pose
- Increase flexibility, strengthen your muscles
- Improve your posture.
- Help relieve tension in your back and shoulders
- Help to reduce stress.
8. Bridge Pose
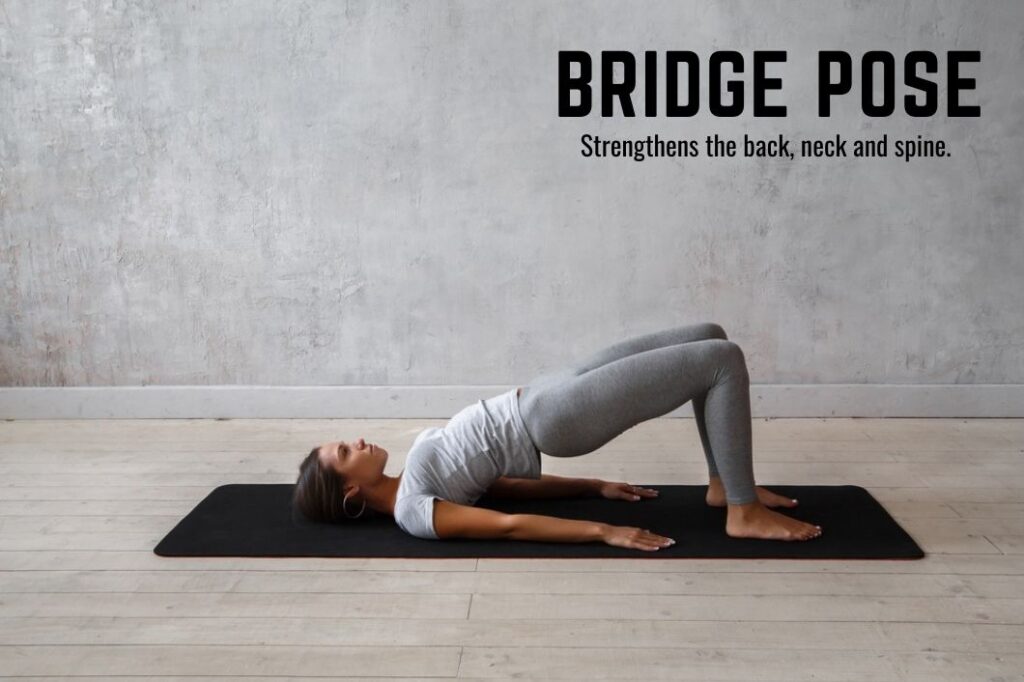
Yoga’s bridge pose, also known as Setu Bandha Sarvangasana, is a supine backbend that also opens the chest. This posture is suitable for beginners strengthens the back. Try incorporating bridge pose into your practice two or three times a week to experience the full benefits of this wonderful yoga pose.
How to perform Bridge Pose
- To get into bridge pose, begin by lying on your back.
- Bring your knees up towards your chest and press your feet into the floor.
- Then, press your hips up towards the ceiling while you keep your arms at your sides. You should feel a slight arch in your back. Try to keep your neck and shoulders relaxed throughout the pose.
- Hold this pose for five to 10 breaths before releasing it.
- In order to make bridge pose more challenging, you can try lifting one leg off the ground and pointing your toes.
- Hold the pose for 10 seconds before lowering your leg back down and repeating on the other side
Benefit of Bridge Pose
- Strengthens the back
- Strengthens neck and spine
- Improves circulation of blood
9. Shoulder Stand Pose
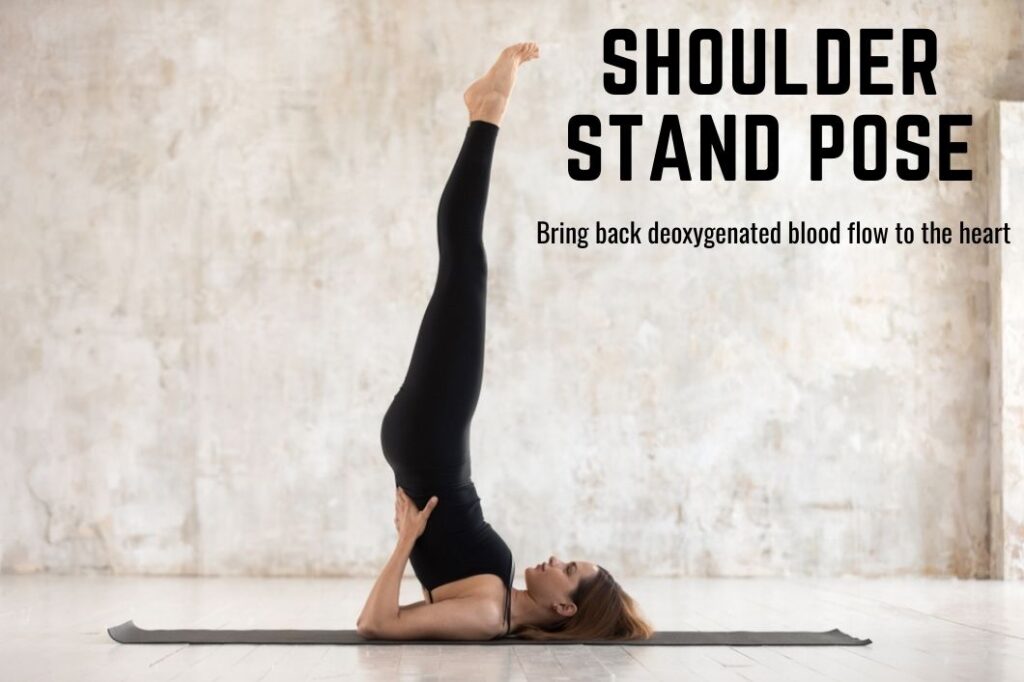
Shoulder stand pose, also called Sarvangasana, is an advanced pose in the practice of yoga. It is considered a powerful pose, as it engages and strengthens the entire body. When performed correctly, it can create a feeling of expansiveness in the body by creating space in the spine and chest. It can also provide therapeutic benefits, such as improved digestion, aiding with menopause symptoms, and calming the nervous system.
How to perform Stand Pose
- To get into Shoulder Stand Pose, start by lying flat on your back. Bring your knees up towards your chest and hug them in.
- Then, press your hands firmly into the mat and lift your feet off the ground.
- Slowly, straighten your legs until they are pointing straight up toward the ceiling. As you do this, keep your hands firmly on the ground for support.
- Once your legs are fully extended, gently walk your feet closer towards your head, keeping your core and legs engaged.
- Try to stay in the pose for at least 30 seconds, then slowly and carefully lower your feet back to the ground.
Benefit of Stand Pose
- Improved digestion,
- Strengthened immune system,
- Bringing back deoxygenated blood flow to the heart.
10. Twisted Chair pose
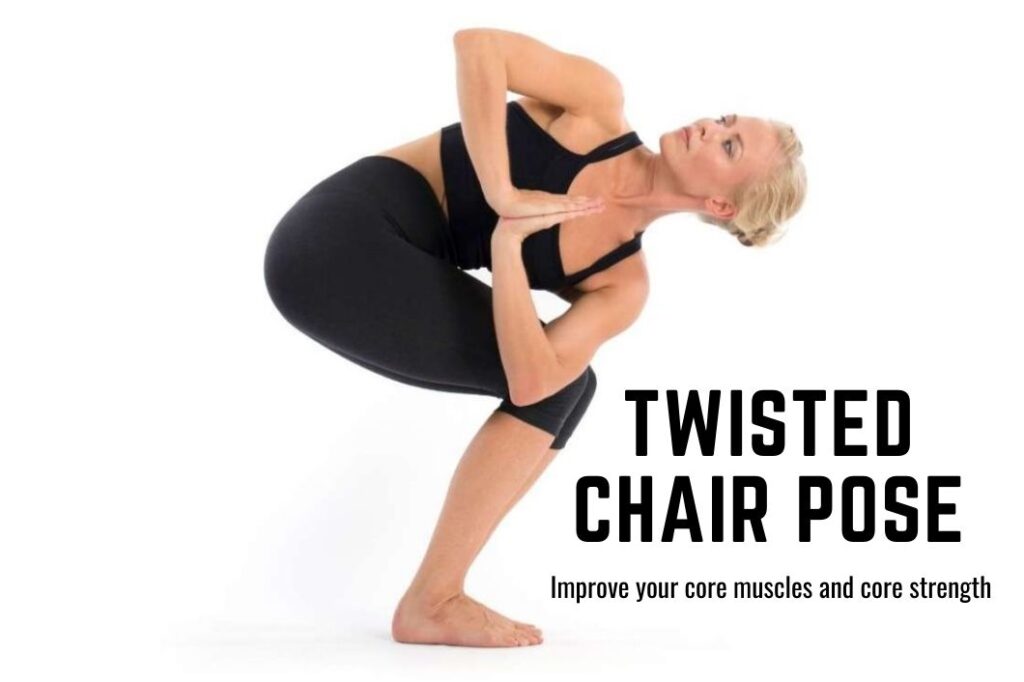
Twisted chair pose is a great way to open up the body, release tension, and build strength. It is a standing pose that utilizes the entire body, with the arms and legs extended to create a twisted position.
How to perform Twisted Chair pose
- To begin, stand tall with your feet together or hip-width apart.
- Place your hands on your hips and twist your torso and hips to the left, keeping your shoulders and head facing forward
- Sit on the edge of a chair with your feet flat on the ground
- Inhale and lengthen your spine
- Exhale and twist to the right, placing your right hand on the back of the chair
- Inhale and twist to the left, placing your left hand on the back of the chair
- Exhale and return to the starting position
Benefit for Twisted Chair pose
- Strengthens the glutes, thighs and ankles
- Strengthens lower back.
- Improve your core muscles and core strength
If you’re looking for more healthy and delicious meal ideas for loosing weight with this yoga routine, be sure to check out our recipe for a Vegan Minestrone Soup! This colorful dish is packed with veggies, protein, and whole-grain pasta, making it a satisfying and nutritious choice for any time of day.